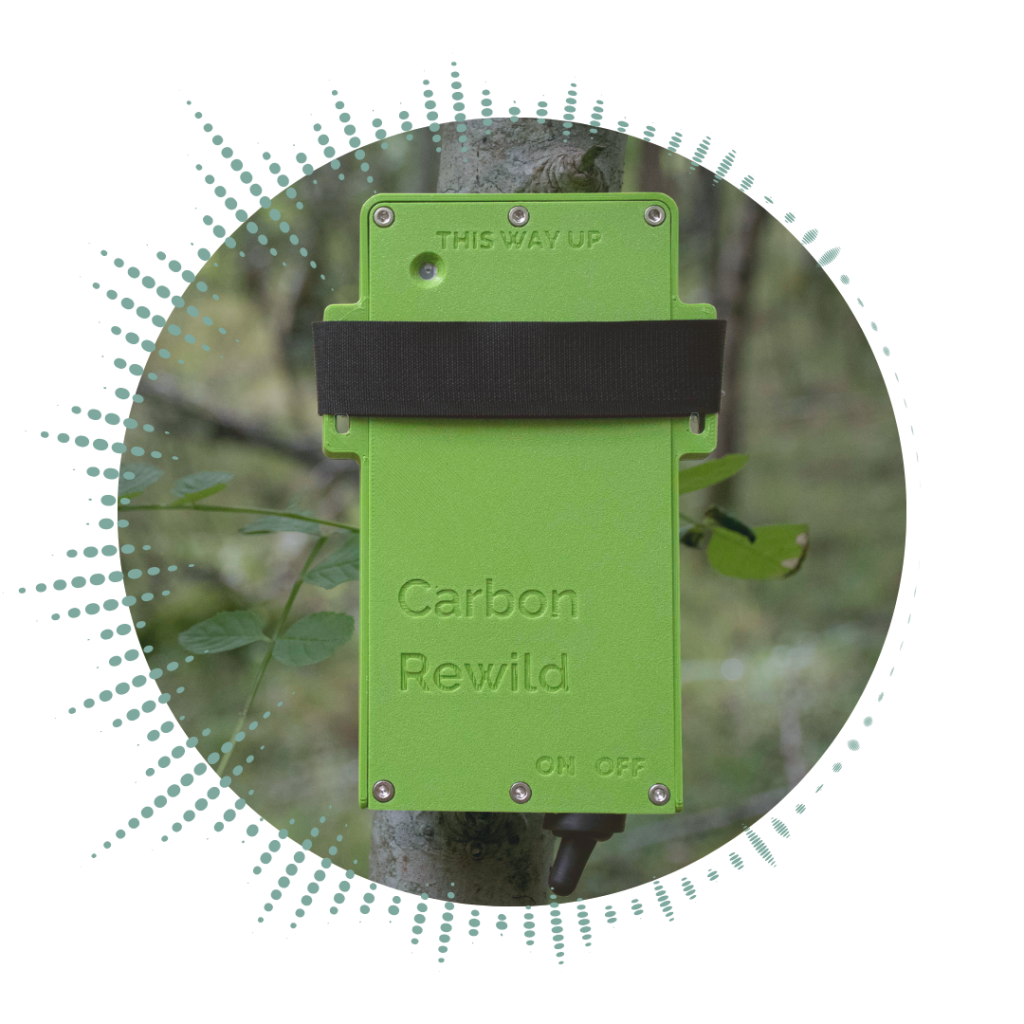
Our mission at Carbon Rewild is to make the monitoring of wildlife and biodiversity more accessible. This guide will provide an overview of how to set up your recording device on site. Please note we have several different versions of our recording unit, which may look different to the version shown in the video below. However, the principles discussed are applicable to all device types.
Our instructions include the following steps to get setup. Within your Carbon Rewild package, you should find the recording units, straps, and printed instructions for setup. The survey setup process has the following simple steps:

1. Shipping and Unboxing
Once you make an order with us we will ship you a recording unit.
We will ship the recording unit(s) several days in advance of your chosen survey period. Within your package, you will find the following:
- Recording unit(s)
- Velcro strap(s)
- Instructions
IMPORTANT – you must keep the box and the return envelope in a safe place as you will need it to return the device. If you have ordered a single device, we will include return packaging within the postage box. For multiple devices, we will arrange courier collection of the box and recording devices at the end of the survey.

2. Setting Up and Recording
Thread the Velcro strap through the slots in the device, so that the recording unit can be secured to an appropriate tree, or post. The post or tree should be approximately the same width as the recording unit, and should not be narrower than 6cm, or there is a risk the strap cannot be securely tightened for the monitoring period.
If you would like more details and guidance about how to select an appropriate location, please see here.
As a brief overview, however, locate the device:
- In or near a suitable habitat
- Away from sources of noise such as running water or a road
- Away from public areas such as footpaths
- 1-2m off the ground
Please discuss with the Carbon Rewild team if you have any questions about finding a suitable location. We offer free survey design and guidance as part of our services.
3. Device Status Check
Then TURN ON THE DEVICE by flicking the switch into the ON position
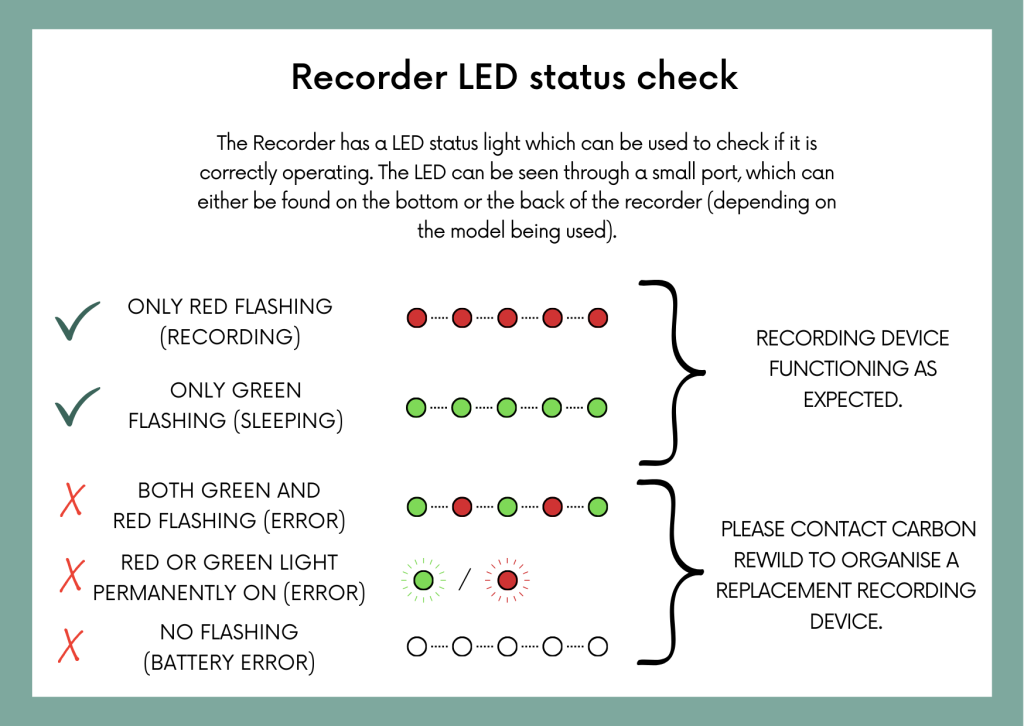
Please check the recorder status lights when setting up as per the instructions below. If there are any issues with the recorders, please request a replacement.
It is especially important for bat monitoring to avoid vegetation and large surfaces nearby, as ultrasonic signals are more easily affected by these features, and can limit species identification.
Top tip: don’t just think about when you are deploying the recording devices, but think about the whole survey period. If you are deploying at the beginning of Spring, then vegetation will likely grow during the survey period, causing issues later on. You may also find yourself crawling through overgrown bramble to retrieve a device… we’ve been there!

3. Device Status Check
Then TURN ON THE DEVICE by flicking the switch into the ON position
Please check the recorder status lights when setting up as per the instructions below. If there are any issues with the recording units, please request a replacement as soon as possible.


4. Save the location
Once the recording unit is in place, make a record of its location, along with the Device ID of the recording unit. This is normally printed on the bottom of the unit. We recommend one of the following options for capturing the location of the recording unit:
- What3Words
- Longitude and Latitude

5. (End of Survey) Retrieve Units
After the survey period has finished, relocate the recording unit(s) and TURN THE DEVICE OFF by flicking the switch into the OFF position.
Then undo the Velcro strap and place the device and the strap back into the original box.
Please follow the return instructions for your order. If you have ordered a single device, there will be return packaging included in the box. For larger orders, we will be in touch to organise courier collection.
If you have any questions about finding a suitable location, please speak to a member of the Carbon Rewild team, we are happy to offer guidance to help you maximise your survey.
